使用s3cmd同步文件到digitalocean的对象存储spaces的方法
S3cmd是免费的命令行工具和客户端,用于在Amazon S3和其他使用S3协议的云存储服务提供商(例如Google Cloud Storage或DreamHost DreamObjects)中上载,检索和管理数据。它最适合熟悉命令行程序的高级用户。它也是批处理脚本和自动备份到S3(由cron等触发)的理想选择。 S3cmd用Python编写。它是根据GNU公共许可证v2(GPLv2)提供的一个开源项目,可免费用于商业和私人用途。您只需支付Amazon使用其存储的费用。 自2008年首次发布以来,S3cmd已添加了许多功能和选项。我们最近统计了60多个命令行选项,包括分段上传,加密,增量备份,s3 sync,ACL和元数据管理,S3空间大小,空间策略等!
下面是使用s3cmd同步文件到digitalocean的对象存储spaces的方法
安装s3cmd
1
2
3
4
5
6
7
8
9
10
apt-get install s3cmd //debian/ubutnu
yum install s3cmd  //centos/fedora
//不建议使用上面的方法安装s3cmd,因为安装的s3cmd版本过低
//建议使用以下方法安装,或进入s3cmd下载程序自行安装
//安装pip
yum install python-pip  //centos
apt-get install python-pip  //debian/ubuntu
apt-get install python-setuptools
//安装s3cmd
pip install s3cmd
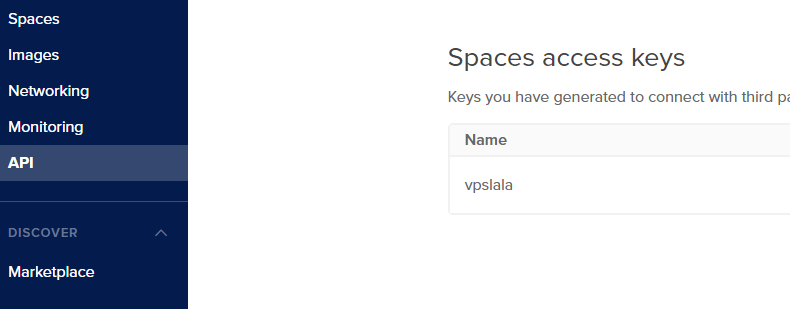
https://cloud.digitalocean.com/account/api

配置s3cmd同步文件到digitalocean的对象存储spaces
你可以使用s3cmd --configure命令进入交互式配置s3cmd
但是为了更加简单配置s3cmd同步文件到digitalocean的对象存储spaces
这里直接写入s3cmd配置文件,,,以下是代码,带有注释,方便理解和配置
创建一个.s3cfg的文件,写入以下代码
1
2
3
4
5
6
7
8
9
10
11
12
13
14
15
16
17
18
19
20
21
22
23
24
25
26
27
28
29
30
31
32
33
34
35
36
37
38
39
40
41
42
43
44
45
46
47
48
49
50
51
52
53
54
55
56
57
58
59
60
61
62
63
64
65
66
67
68
69
70
71
72
73
74
75
76
77
78
79
80
81
82
83
84
[default]
access_key = yourkey
access_token =
add_encoding_exts =
add_headers =
bucket_location = US
ca_certs_file =
cache_file =
check_ssl_certificate = True
check_ssl_hostname = True
cloudfront_host = cloudfront.amazonaws.com
connection_pooling = True
content_disposition =
content_type =
default_mime_type = binary/octet-stream
delay_updates = False
delete_after = False
delete_after_fetch = False
delete_removed = False
dry_run = False
enable_multipart = True
encrypt = False
expiry_date =
expiry_days =
expiry_prefix =
follow_symlinks = False
force = False
get_continue = False
gpg_command = /usr/bin/gpg
gpg_decrypt = %(gpg_command)s -d --verbose --no-use-agent --batch --yes --passphrase-fd %(passphrase_fd)s -o %(output_file)s %(input_file)s
gpg_encrypt = %(gpg_command)s -c --verbose --no-use-agent --batch --yes --passphrase-fd %(passphrase_fd)s -o %(output_file)s %(input_file)s
gpg_passphrase =
guess_mime_type = True
host_base = sfo2.digitaloceanspaces.com
host_bucket = %(bucket)s.sfo2.digitaloceanspaces.com
human_readable_sizes = False
invalidate_default_index_on_cf = False
invalidate_default_index_root_on_cf = True
invalidate_on_cf = False
kms_key =
limit = -1
limitrate = 0
list_md5 = False
log_target_prefix =
long_listing = False
max_delete = -1
mime_type =
multipart_chunk_size_mb = 15
multipart_max_chunks = 10000
preserve_attrs = True
progress_meter = True
proxy_host =
proxy_port = 0
public_url_use_https = False
put_continue = False
recursive = False
recv_chunk = 65536
reduced_redundancy = False
requester_pays = False
restore_days = 1
restore_priority = Standard
secret_key = //your key
send_chunk = 65536
server_side_encryption = False
signature_v2 = False
signurl_use_https = False
simpledb_host = sdb.amazonaws.com
skip_existing = False
socket_timeout = 300
stats = False
stop_on_error = False
storage_class =
throttle_max = 100
upload_id =
urlencoding_mode = normal
use_http_expect = False
use_https = True
use_mime_magic = True
verbosity = WARNING
website_endpoint = http://%(bucket)s.s3-website-%(location)s.amazonaws.com/
website_error =
website_index = index.html

//除了添加注释的需要填写和注意外,其它的默认不要修改,重复一次不要修改,默认即可
创建新Bucket:
s3cmd mb s3://mybucket
list当前bucket:
s3cmd ls 列出bucket中的文件:
s3cmd --recursive ls s3://demobucket #--recursive 递归目录
s3cmd --recursive ls s3://demobucket/rgw
文件上传:
s3cmd put demo.xml s3://demobucket/demo.xml
#上传目录
s3cmd put --recursive dir1 dir2 s3://demobucket/dir1 #目标目录不用提前创建,上传时会自动创建
文件下载:
s3cmd get s3://demobucket/demo.xml demo2.xml
#下载目录
s3cmd get --recursive s3://demobucket/dir1
#带目录树下载
s3cmd get --recursive s3://demobucket/dir1/*
删除:
s3cmd del s3://demobucket/demo.xml
s3cmd del --recursive s3://demobucket/dir1/ #整个目录树
删除bucket:
s3cmd rb s3://demobucket # bucket 必须为empty,否则需要带--force 强制删除
同步:
1
2
3
s3cmd sync ./ s3://demobucket  #同步当前目录下所有文件
s3cmd sync --delete-removed ./ s3://demobucket   # 删除本地不存在的文件
s3cmd sync --skip-existing ./ s3://demobucket    # 禁止MD5校验,跳过本地已存在文件
高级同步操作
排除、包含规则(- -exclude 、- -include)
s3cmd sync --exclude '.doc' --include 'dir2/' ./ s3://demobucket/
从文件中载入排除或包含规则。(- -exclude-from、- -include-from)
1
2
3
4
5
6
s3cmd sync --exclude-from demo.txt ./ s3://demobucket/
demo.txt 文件内容:
#comments here
*.jpg
*.png
*.gif
正则表达式排除同步的目录
--rexclude 、--rinclude、--rexclude-from、--rinclude-from
s3cmd同步文件到digitalocean的对象存储spaces演示
1
2
3
/usr/local/bin/s3cmd sync /var/www/demo   s3://demo/  --acl-public
nohup bash /usr/local/bin/s3cmd sync /var/www/demo   s3://demo/  --acl-public &
//后台运行s3cmd
💘 相关文章
- Method of using s3cmd to synchronize files to digitalocean object storage spaces
- cloudflare R2 存储CORS 策略配置多域名的方法
- buyvm添加块存储Block Storage的方法
- lsyncd同步排除目录和文件的两种方法
- digitalocean涨价了
- DigitalOcean更新了云主机的价格,最低配的只需要4美金,但是总体上是涨价了
- 新商家aulerion简单测评
- 老牌vps供应商linode提供免费3个月的对象存储服务
- PicGo配置兼容亚马逊s3的digitalocean space的方法
- digitalocean上綫美國舊金山SFO3數據中心,附測試數據